Getting started with Amazon EKS Anywhere local cluster on AWS Cloud9 ..
The keenly awaited Amazon EKS Anywhere is a new deployment option of Amazon EKS that helps customers simplify the creation and operations of Kubernetes clusters on customer-managed infrastructure aka “your data center or servers” ;-) and it became generally available last week on Sept 8th 2021.
EKS Anywhere gives customers on-premises Kubernetes operational tooling that’s consistent with Amazon EKS. Customers can leverage the EKS console to view all of their Kubernetes clusters (including EKS Anywhere clusters) running anywhere, through the EKS Connector (which is in public preview).
EKS Anywhere is open-source and any customer can download and install it on their on-premises infrastructure. Amazon EKS Anywhere Support Subscription is available for purchase in all AWS public commercial regions
EKS Anywhere supports VMware vSphere as of today for production deployments, with support for other deployment targets in the near future, including support for bare metal coming in 2022. There is also an option to spin up local clusters using Docker on Ubuntu or MacOS (for dev and testing purposes only) and that is what we will create in this blog ..
Note: I had also blogged about the other offering from AWS Container Services — ECS Anywhere, a feature of Amazon ECS that enables you to easily run and manage container workloads on customer-managed infrastructure. You can refer to this blog at https://cmani.medium.com/look-ma-i-can-run-containers-on-amazon-ecs-anywhere-on-premises-or-on-the-cloud-9e5fd1b02f74
Important links:
- Followed the blog as per https://aws.amazon.com/blogs/aws/amazon-eks-anywhere-now-generally-available-to-create-and-manage-kubernetes-clusters-on-premises/ which installs an EKS Anywhere cluster on a Mac ..
- EKS anywhere documentation — https://anywhere.eks.amazonaws.com/docs/overview/
- EKS connector documentation — https://docs.aws.amazon.com/eks/latest/userguide/eks-connector.html . The nice thing about this connector is that you can even use it with other Kubernetes providers also and view the cluster via the AWS console..
The goal of this blog is to launch an local cluster on an single AWS Cloud 9 instance on AWS running Ubuntu, which is similar to what developers will need to test on something local.
Statutory warning !! — As always, these steps are not comprehensive, and this is for my “personal getting up-to speed” hacky way of learning stuff and you should rely on official AWS documentation for the complete picture ..
Also, look at https://anywhere.eks.amazonaws.com/docs/concepts/eksafeatures/ to get more clarity on the key concepts between EKS Anywhere (on your infra) and Amazon EKS (on AWS Cloud) ..
Lets start the engines !!
Steps:
I followed the steps in the documentation for creating a local cluster — https://anywhere.eks.amazonaws.com/docs/getting-started/local-environment/
Prerequisites:
I absolutely love AWS Cloud9, and used AWS Cloud9 and launched an m5.xlarge instance type with Ubuntu (might work with low end instances, have not tried. The local cluster has some basic infra and software pre-reqs, please check documentation — https://anywhere.eks.amazonaws.com/docs/getting-started/install/). The nice things about AWS Cloud9 -totally cloud way of development using a browser, nothing local needs to be installed, security is tied with the AWS console, has a bunch of software already pre-installed like Docker, can select either Amazon Linux or Ubuntu, add IAM roles to the underlying EC2 instance running Cloud9 and a whole lot of cool features.

- Resized the attached EBS volume by adding an additional 50 GB as per the instructions at https://docs.aws.amazon.com/cloud9/latest/user-guide/move-environment.html#move-environment-resize
- Installed eksctl, kubectl as per the documentation — https://docs.aws.amazon.com/eks/latest/userguide/getting-started-eksctl.html
- Installed EKS anywhere plugin as per https://anywhere.eks.amazonaws.com/docs/getting-started/install/ (I did not use brew .. )
export EKSA_RELEASE="0.5.0" OS="$(uname -s | tr A-Z a-z)"
curl "https://anywhere-assets.eks.amazonaws.com/releases/eks-a/1/artifacts/eks-a/v${EKSA_RELEASE}/${OS}/eksctl-anywhere-v${EKSA_RELEASE}-${OS}-amd64.tar.gz" \
    --silent --location \
    | tar xz ./eksctl-anywhere
sudo mv ./eksctl-anywhere /usr/local/bin/- Start the installation of a local EKS anywhere cluster
$ eksctl version
0.66.0$ eksctl anywhere version
v0.5.0$ CLUSTER_NAME=dev-cluster$ eksctl anywhere generate clusterconfig $CLUSTER_NAME \
>     --provider docker > $CLUSTER_NAME.yaml
the cluster config file looks like this:
apiVersion: anywhere.eks.amazonaws.com/v1alpha1
kind: Cluster
metadata:
  name: dev-cluster
spec:
  clusterNetwork:
    cni: cilium
    pods:
      cidrBlocks:
      - 192.168.0.0/16
    services:
      cidrBlocks:
      - 10.96.0.0/12
  controlPlaneConfiguration:
    count: 1
  datacenterRef:
    kind: DockerDatacenterConfig
    name: dev-cluster
  externalEtcdConfiguration:
    count: 1
  kubernetesVersion: "1.21"
  workerNodeGroupConfigurations:
  - count: 1---
apiVersion: anywhere.eks.amazonaws.com/v1alpha1
kind: DockerDatacenterConfig
metadata:
  name: dev-cluster
spec: {}---
Create the cluster, it took around 6 minutes or so for me ..
$ eksctl anywhere create cluster -f $CLUSTER_NAME.yaml
Ensure that kubectl is now configured to communicate with the EKS anywhere cluster ..
$ export KUBECONFIG=${PWD}/${CLUSTER_NAME}/${CLUSTER_NAME}-eks-a-cluster.kubeconfig$ kubectl get ns
NAME                                STATUS   AGE
capd-system                         Active   8m8s
capi-kubeadm-bootstrap-system       Active   8m19s
capi-kubeadm-control-plane-system   Active   8m11s
capi-system                         Active   8m22s
capi-webhook-system                 Active   8m24s
cert-manager                        Active   9m3s
default                             Active   10m
eksa-system                         Active   7m44s
etcdadm-bootstrap-provider-system   Active   8m18s
etcdadm-controller-system           Active   8m16s
kube-node-lease                     Active   10m
kube-public                         Active   10m
kube-system                         Active   10m$ kubectl get nodes
NAME                                STATUS   ROLES                  AGE     VERSION
dev-cluster-4l5d5                   Ready    control-plane,master   10m     v1.21.2-eks-1-21-4
dev-cluster-md-0-7dffd8b78d-d7cz8   Ready    <none>                 9m59s   v1.21.2-eks-1-21-4

Deploy a test application
Followed the steps to deploy a test application — https://anywhere.eks.amazonaws.com/docs/tasks/workload/test-app/
$ kubectl apply -f "https://anywhere.eks.amazonaws.com/manifests/hello-eks-a.yaml"
deployment.apps/hello-eks-a created
service/hello-eks-a created#forward to port 8080, so that we can view the test application within cloud9
$ kubectl port-forward deploy/hello-eks-a 8080:80
Now, you can view the test application on a browser within Cloud9 tools/preview/preview running application ..

Configuring the EKS connector (public preview)
Follow the documentation as per https://docs.aws.amazon.com/eks/latest/userguide/eks-connector.html to create the IAM roles and policies for the EKS connector.
Note: I kind of tripped at this step, while creating the roles … Thanks to my colleague, Yohan, who helped me out ;-) There are two roles involved here, which will need to be created — a service linked role and an IAM role .. The documentation has been updated to make the steps more explicit !!


Sidenote: Folks have registered other managed Kubernetes providers like GKE using the EKS Connector ;-)

Since I registered the cluster via the AWS console, you can download and apply the configuration file. The steps are slightly different, if you have registered the cluster via the AWS CLI.
$ kubectl apply -f eks-connector.yaml$ aws eks describe-cluster \
> --name "eks-a-1" \
> --region us-west-2
{
    "cluster": {
        "name": "eks-a-1",
        "arn": "arn:aws:eks:us-west-2:xxx:cluster/eks-a-1",
        "createdAt": "2021-09-14T14:18:58.417000+00:00",
        "status": "ACTIVE",
        "tags": {},
        "connectorConfig": {
            "activationId": "b6f5ee8b-9c2f-43b6-ae38-3e8d7668f7d6",
            "activationExpiry": "2021-09-17T14:18:58.011000+00:00",
            "provider": "EKS_ANYWHERE",
            "roleArn": "arn:aws:iam::xxx:role/AmazonEKSConnectorAgentRole"
        }
    }
}

We need to follow https://docs.aws.amazon.com/eks/latest/userguide/connector-grant-access.html to grant permissions to view the cluster from within the AWS EKS console.
I followed the instructions at https://www.eksworkshop.com/030_eksctl/console/ to get Role ARN of Cloud9
c9builder=$(aws cloud9 describe-environment-memberships --environment-id=$C9_PID | jq -r '.memberships[].userArn')
if echo ${c9builder} | grep -q user; then
 rolearn=${c9builder}
        echo Role ARN: ${rolearn}
elif echo ${c9builder} | grep -q assumed-role; then
        assumedrolename=$(echo ${c9builder} | awk -F/ '{print $(NF-1)}')
        rolearn=$(aws iam get-role --role-name ${assumedrolename} --query Role.Arn --output text)
        echo Role ARN: ${rolearn}
fi
and I used this Role ARN to update the Amazon EKS Connector cluster role and IAM user yaml files as per https://docs.aws.amazon.com/eks/latest/userguide/connector-grant-access.html before applying them to the local cluster using kubectl ..
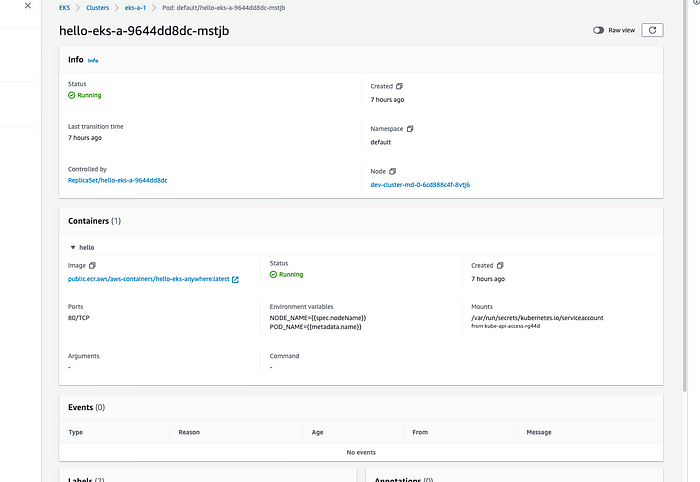
and yeah !! I can now the view the EKS anywhere cluster from AWS Console !!


Finally
There are a bunch of steps at https://anywhere.eks.amazonaws.com/docs/tasks/ for doing more advanced steps .. I found the installation, including the use of EKS connector very easy and straightforward compared to my experience of installation using other methods like kops in the past ..
I hope to try my hands on a production cluster on vSphere, once I get access to an vSphere cluster ;-)